Here is a tutorial for the flower ring that I made...
Elastic - of desired color and size
Flower button - or any other button
Sewing needle
Thread
Scissors

Wrap the elastic around your chosen finger (I chose my left middle) and leave about 1/2 - 1 inch extra for sewing.
I used a pen to mark where I would sew it together, because I found it difficult to hold the elastic and put a pushpin through it simultaneously. But perhaps you're Superwoman! I mean, of course you are!
I used a pen to mark where I would sew it together, because I found it difficult to hold the elastic and put a pushpin through it simultaneously. But perhaps you're Superwoman! I mean, of course you are!
After marking (or not), take the elastic off your finger and stick a pushpin through it to hold your place, like so:
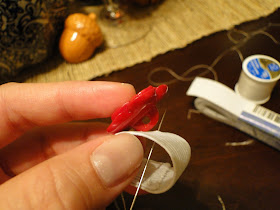
Then, start sewing! I put the knotted end of my thread on the under side so it will not be seen.
I also sewed in a rectangular shape around the area that overlaps, to give it extra hold.
I also sewed in a rectangular shape around the area that overlaps, to give it extra hold.
Once you have your rectangle sewn, tie it off. Then you have the ring part of the ring!
Now for the pretty part...
Take the button (or charm) you wish to place on your ring, and set it where you want it to be on the elastic.
Then, simply sew the button on, going over it several times to make it sturdy and strong.
Then, simply sew the button on, going over it several times to make it sturdy and strong.
And voila! You have a new ring!
This is what my finished product looks like:
Hope you like it! Please leave comments..we want to know what you think!
Blessings,
Michelle


No comments:
Post a Comment
Please leave a comment! I love reading your comments! It seriously makes my day. -Nikki