So I did! But in my own way. I definitely based my own creation on this one...Isn't that called inspiration? Or maybe plagiarism...I don't know ;). Either way this is what I did...
 What I used...
- A vine wreath I already had
- About 1/8-1/4 yards burlap (4 colors) ( I had some left over from making my Mom a wreath so I figured, eh, why not!
- Hot Glue gun
- Wooden 'D' Cut Out
- Some paint for the D
- Fake Pearl Beads
First I painted my 'D' (for our last name). I wanted it to have time to dry while I was assembling the other parts.
( Call me ghetto if you want...but I've been painting with a paper towel for years :) )
In order to cut burlap in a straight line here is a great tutorial for that. Basically just pull one of the strings out and you have a cutting guide.
Then I started making different sizes of burlap rosettes with my strips of burlap. Here is the tutorial I used. Rosettes Tutorial
I followed it pretty closely but didn't use felt at the end to close it. I just folded the end of the burlap over itself and secured it with some hot glue.
Like so-

First you fold your strip in half and secure with a dab of hot glue.
Then start rolling. I'd say around 7-8 times or until you have a little roll like pictured.

After you twist and glue (watch the tutorial it's great!) Leave about an inch and put hot glue on the bottom of your rose.

Then press the burlap over the bottom of the flower. Be careful, burlap has holes, duh Nikki. But seriously the glue will seep through and burn like the dickens!
After I made a BUNCH of rosettes (about 19)
After that I decided which rosettes were worthy of having a pearl glued on them and applied the pearls with a dab of hot glue.
 |
| Excuse the ugly carpet...Welcome to rentals |

Take about a 2 inch wide piece of burlap and fold in half and glue

Then glue the bottoms together to get a loop.
Then I started to assemble my wreath, using the one I found as a model for the placement of my rosettes (my wreath is bigger than the one shown and I had to kind of fudge it/make it my own).
After that I was ready to put on the D. I decided instead of wrapping twine around my wreath I would hot glue a piece of burlap around it and place the D on top of it.

And there you have it folks...My take on the $58.00 wreath from Etsy. I used things I already had and put them together to make something better! I would say I spent about $5.00.
$5 instead of $60!? And a comparable outcome with a little fall color!!? Ummm yes please!

So go on...GET YOUR CRAFT ON!
-Nikki
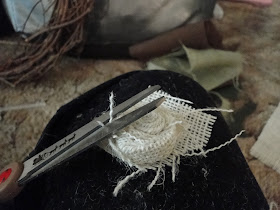
P.S if your rosettes are looking all frayed and what not
Don't be afraid to give them a little haircut :)


Please leave a comment if you found this useful, liked it, or think something could be improved! Thanks!
ReplyDelete