Showing posts with label Fall. Show all posts

Wednesday, October 31, 2012

10 Halloween Inspired Crafts-Food-Fun

Happy Halloween!!! This is a post dedicated to all of those cute Halloween ideas that I thought were just oh so cute, but as I don't decorate for Halloween since it's just me and hubs so far, I didn't make.  Here they are, my favorite Halloween inspired crafties, food, and costumes!!!


Pumpkin Pie Syrup by Everyday Art
(I already tried this and it is scrumptious on oatmeal and in coffee too!)


Have a spooky and fun filled Halloween everyone!

BOO,

Friday, September 28, 2012

Michelle's Musings: Fall Feather Centerpiece, Yankee Doodle Meets Country Fall

I love Fall. The trees are filled with my favorite colors, and nature is at its finest - a beautiful mess of colorful leaves falling and landing in random, scattered places. (And there are piles of leaves to play in!)

I have been disappointed this year because it seems that in some stores, Fall is being taken over by Halloween and even Christmas! I mean, those are two great and important holidays, but I would like for once, rather than striving to get ready for the season ahead, to take the time to breathe in the season that is now falling all around us. The magic word - now. I think that in pausing to enjoy the now, life finds a new calm and peace.

So, to honor my desire to enjoy the season now, I have created something that merges several things that remind me of Fall. These items include red and yellow flannel, twine, wine corks, and feathers! I know, these are kind of random things, but they really do remind me of Fall and help me to stop and soak in the moment (now I just need an Amish market, an old red barn, and a field of sunflowers to complete the idea!).

I decided to make a vase for these awesome feathers I found at a craft store. Here's how that went down...


Materials:
jar/bottle (I used an old spaghetti sauce jar)
twine/jute/raffia (whichever you prefer or have on hand)
wine corks (I don't like wine, so I purchased six for about $2 at a craft store)
feather stem (or a real feather, flower, leaves, etc. that you wish to display)
2 small strips of flannel (I bought this flannel on sale for $6/yd. and plan to make a blanket..I just cut a strip from the edge to use for this project - you could even use colorful burlap if you prefer)
rocks or vase gems
hot glue gun/glue
scissors


Using your hot glue gun and only a tiny amount of glue, wrap your twine/jute/raffia around the jar or bottle, glueing down every few inches. A trick that I learned: As you go around the vase and come to a part that was previously glued, if there is a big wad of glue in the line of your twine, use your fingernail to cut the extra glue away from what is holding the last run and get it out of your way - this makes it much easier to make it look smooth.

If you choose, you can put your twine around the entire vase, but I did mine in sections to save time, rather than glueing twine under where I planned to put the flannel.

Once I finished glueing the first section of twine (from the top of the vase until a little way down), I took one strip of flannel and tied it around the vase. I cut the edges into Vs and turned them under, so they would not stick out so much but have a little class and purpose. I then glued another section of twine and tied another piece of flannel around the vase. Then, I did another section of twine, and I was finished!

Some confessions - my glueing of the twine was not perfect, and you could see through some spots. At first this bothered me, then I realized that no artwork is perfect and that it actually made me feel like it was sort of a "window." And what reminds you of Fall (and of our blog!) better than a window?! Fabulous, I know. Also, there was a space left open right under the tie of my flannel pieces. At first, I was going to fill this in with small pieces of flannel, but I realized that like the twine, it gave a little window into the vase. So I left it :)

I was then ready to start stuffing my vase! I used some black rocks that I stole from another vase I was no longer in love with. I purchased these several years ago at a dollar store. You can use whatever color, shape, etc., you like! You can even grab your kids and go outside hunting for rocks! To confess again, I did not have a whole lot of them on hand, so I stuffed the top of the vase with a plastic bag. Hence, you see white under the top flannel piece. Ha! I laugh in the face of imperfection :)

Then I topped the vase off with my corks. I don't know why I like this, but I do. I think it gives it a nice, funky touch. If you don't like them, leave them off. (I don't care!)

Then, like Yankee Doodle, I put a feather in my hat! Well, in my vase. The stem was too long, so I bent it to the length I wanted it. I did not have wire cutters in my immediate vicinity, so I just left the extra. I think that is ok!

And just as simple as that, you have a nice little piece to remind you to step back and enjoy the beautiful moments of Fall. They are fleeting!

Surround your vase with some awesome, multi-height candles and whatever other objects remind you of Fall (pumpkins!), and you can use it as a little display! (I just put mine on my dresser, but be creative - do whatever you like!)

So, after you read this and Pinterest a little more, grab a good book or magazine or a good movie, some yummy warm coffee (or something stronger, if that tickles your fancy), and your favorite flannel blanket, open the window, and enjoy the beautiful moment!

Happy crafting, and Happy Fall!!!


Peace y'all,
Michelle
This project has been linked to The Stuff of Success, Tater Tots and Jello

Friday, September 21, 2012

Michelle's Musings: Fingerprints of Nature on Canvas

This is the story of my newest creation - a tree made by fingerpainting!
I know, I am not 5 anymore, but sometimes reverting to childhood can be both fun and therapeutic! So here we go...


Materials:
white canvas (whatever size or type you like)
burlap
sticks from the yard
bark from a tree
hot glue/hot glue gun - with electrical outlet for power! :)
paints of your chosen colors
paper/styrofoam plate (or artist palette)
your fingers!


I started with a plain ol' blank white canvas (I really love canvas). I put something else I really love on it too - burlap.
Ok, technically mine is more like sackcloth (which I bought from a bolt, but you could probably reuse an old potato sack if you have one!)

I cut the burlap-sackcloth in a rectangle slightly smaller than my canvas so that some of the white would show around the edges. I then hot glued it down. Be sure to use plenty of hot glue to keep it on, but not so much that it weighs it down too much.

Once the burlap was glued down, I went a'huntin' outside. I first began looking only for sticks, but during my search I decided to use tree bark as the trunk of my tree (you know, since that's what God used and all). So I gathered bark and sticks.

After I selected my outdoor supplies, I placed them on top of the burlap to see how I wanted them arranged. Turns out, I placed them just like I wanted them on the first try! I placed my sticks where I wanted them to be for the branches of the tree (I had to break many of the sticks into smaller, more practically-sized pieces). I then glued all this down.
Now, you want to be careful on this step how much hot glue you use, because the bark and sticks can really weigh it down. So don't use too much glue (you don't really need a whole lot anyway).

After this was finished, it was time to get my hands dirty being a kid again!

I selected the colors that I wanted to use for my leaves.
I wanted a fall tree, you know the way things will look here in a few weeks when the leaves really get to changing, but still with lots of green. So I selected 2 shades of green, 2 shades of yellow/gold, 2 shades of red/maroon (although one bottle was veeery empty!), and orange.
[Insert pic]

I only purchased one of the green paints..I used what I already had for all the rest. Since my canvas is fairly small, it did not require a great deal of paint to accomplish my task.

I poured the greens out on my styrofoam plate and got to work! I dabbed each fingertip of my right hand into the paint, so that my leaves would be varying sizes. I only used my fingertips, but you could use your whole fingerprint if you like!
After I fingerpainted a good bit of green, I added in some other colors, like red and yellow.

Then I repeated the greens again, so that the green was the most prominent of all the colors (I wanted it to look like there were only traces of fall beginning).
I added the orange and other shades of yellow and red, then repeated again with my greens.

I continued this pattern (ok, it was more randomized than patterned) until I had very little burlap showing on the area where I wanted leaves. I let the leaves of the tree hang over the burlap and onto the canvas, one, because trees can become invasive, and two, because Nikki suggested it. :) Good teamwork!

I realized that the more "layers" I created by dabbing colors on top of other colors, the more full my tree appeared, which is what I really wanted.
I also put just a couple of leaves falling and a pile of leaves on the "ground" below my tree.

After awhile, my tree was complete! I was satisfied with its color and fullness.

I then signed Nikki's and my initials on the bottom right corner. I will admit my goof on this one...so, I like to sign my canvases in Sharpie, and this one was no different. I first tried signing directly onto the burlap, then quickly realized this was not legible. It kind of even looked bad. Oops! Luckily, I did it at the very bottom of the burlap, where there was no glue right on the edge. (Lucky me!)
So I took my scissors and cut off the very bottom of the burlap. This gave me a little more white space to sign our initials onto the canvas! Yay, it's finally complete!

Then of course, I let it dry.

Random tidbits & tips with this project:
-You can use paint for the trunk and branches if you don't like the use of nature but like the idea of the design. I first planned to do all paint then realized it would be cool to make it 3-dimensional and more fun..more like me!
-You can make your tree be in whatever season you desire. Or, you could make one for every season! They could be interchanged throughout the year or placed together in a broken rectangle on your wall - whatever you like!
-You can make your tree as full or as naked as you like. As I said, layering the colors gives it a more full effect (as does repeating the same colors after using others in between). If you want to make a winter tree that is naked, you can use a lot fewer fingerprints!
-This project can be really great for children, too! (You might want to help them with the hot glue gun, or use Mod Podge or some safer, colder adhesive.) Many kids would probably enjoy the nature hunt for sticks and bark, too!
-As you paint your leaves, be sure to get some paint on the sticks (branches) too. It adds a cool effect (who doesn't love polka-dotted sticks?!) and looks more realistic, because we all know leaves consume their branches!

Please share with us if you decide to make your own fingerpainting tree. We would love to see what you come up with!

Blessings and love,
Michelle

Wednesday, September 12, 2012

My Fall Centerpiece

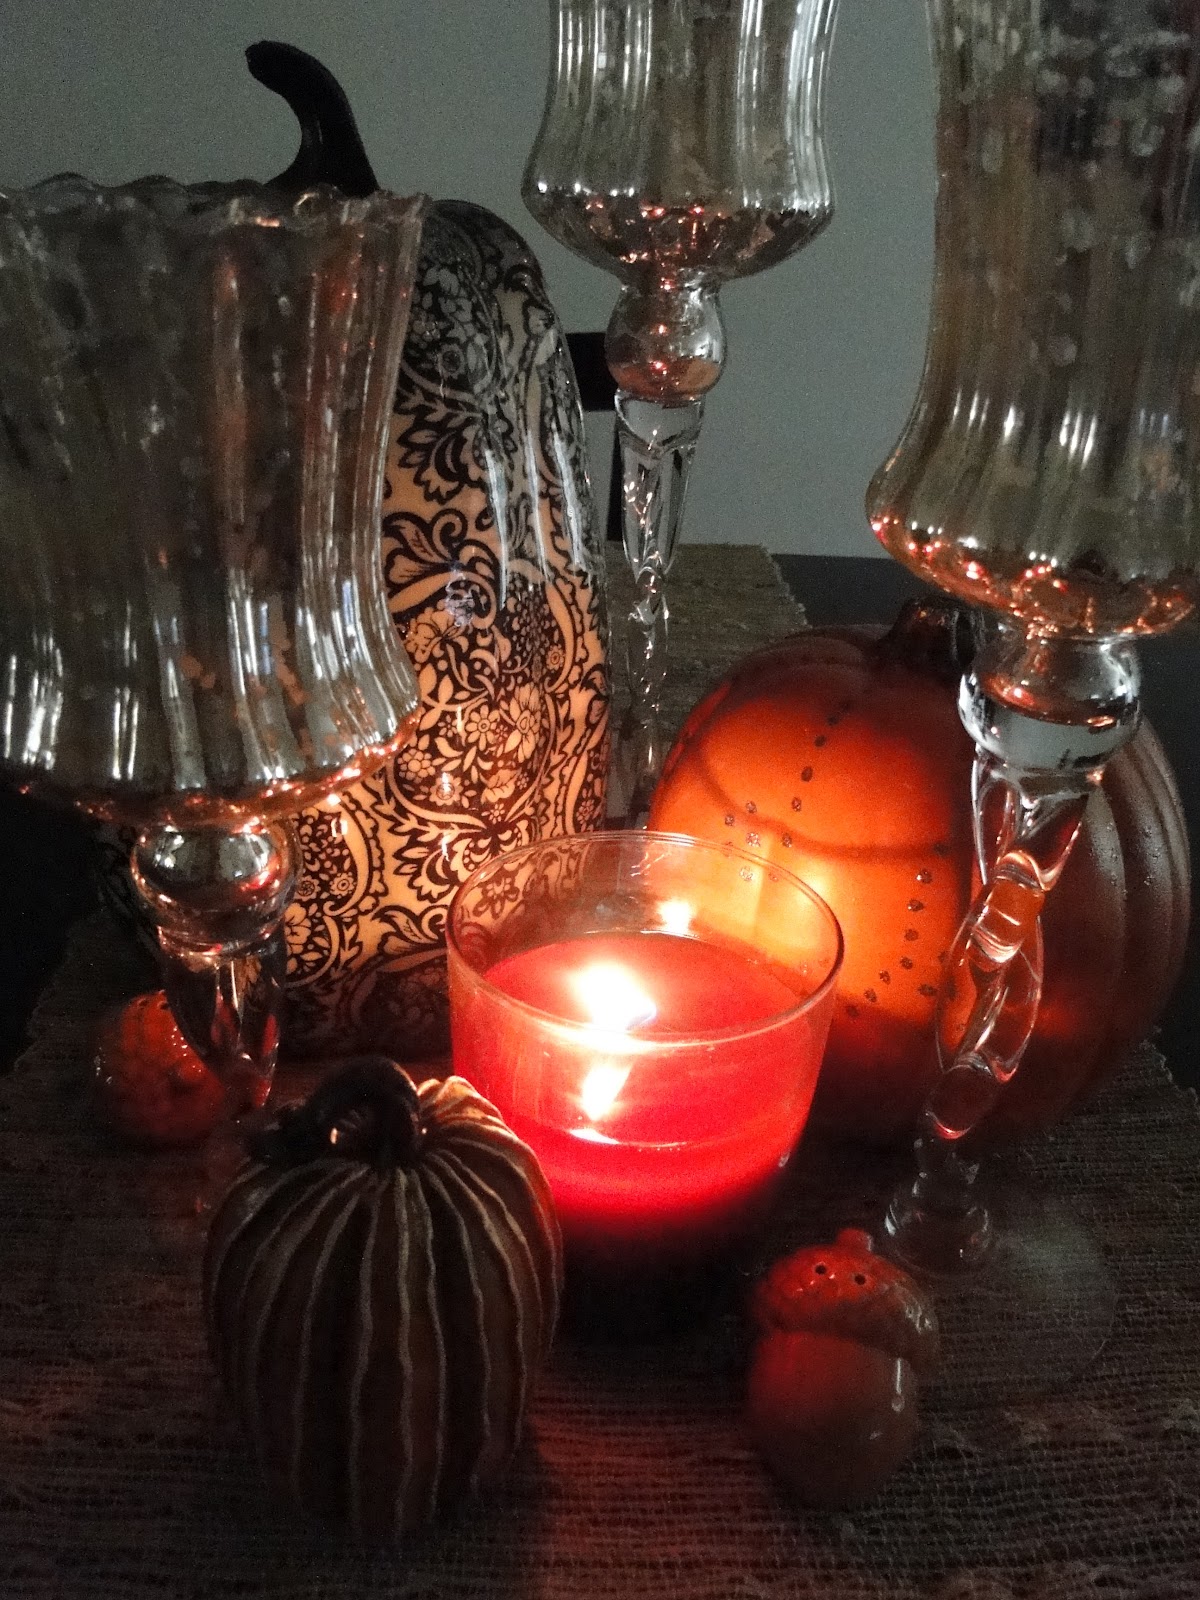
I couldn't help but put out my Fall decorations last night.  Here is one of them! The all important table centerpiece.


Here are some of the things I try to keep in mind when putting together a centerpiece.

  1. Levels- Make sure you have some high, low and middle.
  2. Coordinating colors and theme- The mercury glass goes with the rustic look of the pumpkins, silver and details etc.
  3. CANDLES- I love candles and always try to incorporate at least one.


There you go! My fall centerpiece!


Saturday, September 8, 2012

Fall Wreath Knockoff Tutorial

So I was cruising around on Pinterest (my favorite) and low and behold saw the most beautiful Fall wreath I've ever seen. I mean this thing is stinking GORGEOUS. I must craft this!!!


So I did! But in my own way.  I definitely based my own creation on this one...Isn't that called inspiration? Or maybe plagiarism...I don't know ;). Either way this is what I did...

What I used...

  • A vine wreath I already had
  • About 1/8-1/4 yards burlap (4 colors) ( I had some left over from making my Mom a wreath so I figured, eh, why not!
  • Hot Glue gun
  • Wooden 'D' Cut Out
  • Some paint for the D
  • Fake Pearl Beads


First I painted my 'D' (for our last name).  I wanted it to have time to dry while I was assembling the other parts.
                     ( Call me ghetto if you want...but I've been painting with a paper towel for years :) )

In order to cut burlap in a straight line here is a great tutorial for that. Basically just pull one of the strings out and you have a cutting guide.


Then I started making different sizes of burlap rosettes with my strips of burlap. Here is the tutorial I used. Rosettes Tutorial

I followed it pretty closely but didn't use felt at the end to close it. I just folded the end of the burlap over itself and secured it with some hot glue.

Like so-

First you fold your strip in half and secure with a dab of hot glue.


Then start rolling. I'd say around 7-8 times or until you have a little roll like pictured.


After you twist and glue (watch the tutorial it's great!) Leave about an inch and put hot glue on the bottom of your rose.


Then press the burlap over the bottom of the flower. Be careful, burlap has holes, duh Nikki. But seriously the glue will seep through and burn like the dickens!


                                       After I made a BUNCH of rosettes (about 19)


I made some  burlap leaves to attach to a couple rosettes.

After that I decided which rosettes were worthy of having a pearl glued on them and applied the pearls with a dab of hot glue.


Excuse the ugly carpet...Welcome to  rentals

When I first started the project I hadn't planned on making the ruffles like in the original...BUT the ruffles grew on me. So this is how I made the ruffles-


Take about a 2 inch wide piece of burlap and fold in half and glue


Then glue the bottoms together to get a loop.


Then I started to assemble my wreath, using the one I found as a model for the placement of my rosettes (my wreath is bigger than the one shown and I had to kind of fudge it/make it my own).


After that I was ready to put on the D.  I decided instead of wrapping twine around my wreath I would hot glue a piece of burlap around it and place the D on top of it.


And there you have it folks...My take on the $58.00 wreath from Etsy. I used things I already had and put them together to make something better! I would say I spent about $5.00.

            $5 instead of $60!? And a comparable outcome with a little fall color!!? Ummm yes please!


                                                So go on...GET YOUR CRAFT ON!

                                                             -Nikki


                                      P.S if your rosettes are looking all frayed and what not


                                               Don't be afraid to give them a little haircut :)


Related Posts Plugin for WordPress, Blogger...