Showing posts with label diy. Show all posts

Wednesday, November 14, 2012

Painted Canvas: Love Life

I decided to reuse an old canvas Michelle was getting rid of and make it my own little project! I wanted to make it to hang beside my mirror in the bathroom...you know something inspiring and something truthful to start and end the day on.  I had lots to choose from but decided on this,"Love life as it is, not as ou want it to be." Powerful, truthful and something I've been learning as of late.  I also wanted to incorporate our bathrooms colors and birds...of course.  I just stinkin' love birds, they are just so cute! (if I could have bird everything, I think I would)
Here was my inspiration for the project:
Picture from Pinterest off of http://hihorosie.blogspot.com/
And here is my finished project!


I hope you like it and get inspired to put your own personal mantra on something to remind you of whatever it is you need to be reminded of daily!

XOXO,
This project is featured on Eye Heart


This project is linked up at Not Just a  Housewife, Eye Heart, Kathe with an E, Gunny Sack, Sugar and Dots, Sewing Barefoot and Tuesday Time Out.  You can find links to these fabulous parties and blogs under the page link Linking Partaaaay! Check 'em out!

Tuesday, November 13, 2012

Top Pins of the Week #7

Can you believe it's been just seven weeks since Domestically Modern has been doing it's thing? I certainly can't! I love blogging, I really didn't think I would love it as much as I do. But the community is just so great and the inspiration never runs dry for these people!!  So anyways here are my favorite pins of the week!

I love the look of colored jeans but I can't seem to convince myself to spend the money on them...So this is a good and much cheaper compromise for me! Can't wait to try this out!

I think this is just simply genius.  The organizers made specifically for makeup are stupid expensive and this is such a great and cheap way to organize all your pretty things! I might spray paint mine or do something silly and crafty to it...but I love the idea!

Don't these look sooo good? I thought so, and the fact that I had all the ingredients in my pantry right now males this recipe a winner. Check it out, this would be a hit for the holidays...or heck any day you need a sweet treat!!

So cute, so functional...AND I can make it in an afternoon! Super excited to dig out the sewing machine and get cracking on one of these!

This would be great for the holidays and could go along with the color palate of the room it's going in.  I love how festive it is, and how they used yellow and off white.

So there you have it folks, my pins of the week! Enjoy, repin, and be inspired by these lovely ideas these awesome bloggers had!

XOXO,


Wednesday, October 31, 2012

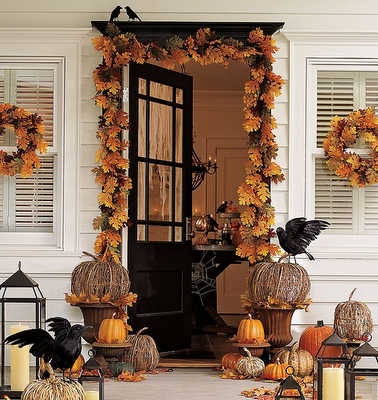
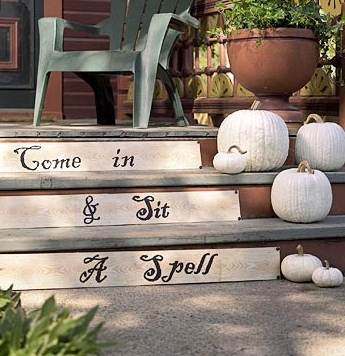
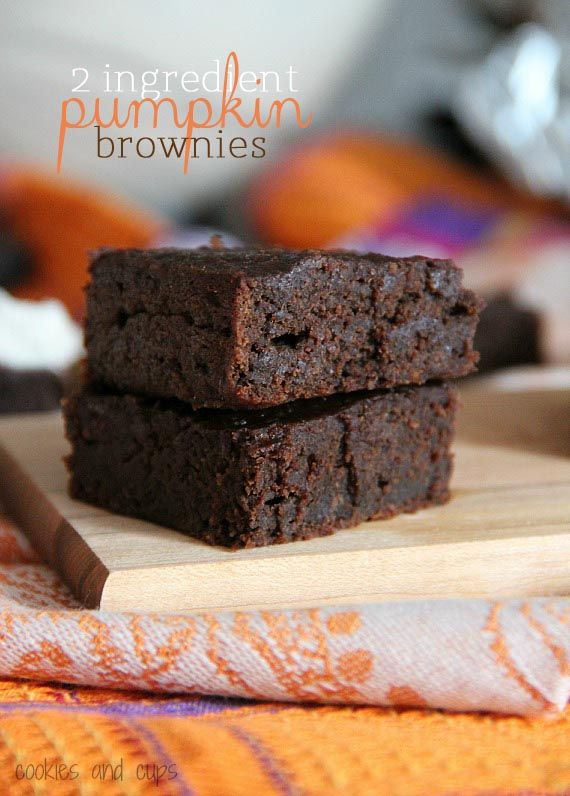
10 Halloween Inspired Crafts-Food-Fun

Happy Halloween!!! This is a post dedicated to all of those cute Halloween ideas that I thought were just oh so cute, but as I don't decorate for Halloween since it's just me and hubs so far, I didn't make.  Here they are, my favorite Halloween inspired crafties, food, and costumes!!!


Pumpkin Pie Syrup by Everyday Art
(I already tried this and it is scrumptious on oatmeal and in coffee too!)


Have a spooky and fun filled Halloween everyone!

BOO,

Thursday, October 25, 2012

DIY Pumpkin Scent Lamp

 Want your house to smell like fresh baked pumpkin pie this fall?  Heck, I know I want my house to smell like pumpkin pie year round!!  As I'm writing this that yummy smell is filling my whole house...delicious. The glow is warm and inviting and it's just so cute!  This is a festive, quick, and easy way to get the most real smelling pumpkin pie scent around! Here's how you do it!

Buy a cute little pumpkin! I got mine at Wally World (Walmart) for 78 cents.

Then cut the top off. I just cut mine straight across.

Then gut it and scrape the sides well (save those seeds for some yummy pumpkin seeds!)

Then use your knife to cut shapes in the top and bottom so that the good smell can get out.  Make it a cute pattern or whatever you want to decorate!  I just did plain old polka dots on mine!

After that I sprinkled cinnamon on the inside, top and bottom and spread it around.  (I also sprinkled a little bit of pumpkin spice in it)


Finally I put two tea lights in it (I used vanilla scented), lit it up and sat back and enjoyed!

Cute, functional and cheap! I spent 78 cents on the whole thing, what a deal! Enjoy your DIY Pumpkin Scent Lamp

BOO,


This project is featured by Kathe with an E,  The Gunny Sack, and Made in a Day!

This project is linked up at Not Just a Housewife, Eye Heart, Kathe with an E, Adventures of a DIY Mom, Chef in Training, Gunny Sack, Sewing Barefoot, Success U, Made U Look Thursdays (Made in a Day), A Crafty Soiree, Naptime Crafters, Naturally Nifty and Classy Clutter.  You can find links to all of these fabulous linking parties and blogs under my page Linking Partaaays!

Monday, October 1, 2012

Top 5 Pins of the Week

     So cute, so easy. A must make!!

A must make to cover my old pillows.  I've been wanting accent pillow. Great DIY.
You could make one for every season! Or even a special party i.e baby shower, b-day, etc.
I haven't gotten to try these out yet...But I'm sure I will by the end of the week! They look delicious and healthier than all that oil and added junk! Plus this is the season we all go pumpkin crazy!
This is seriously the best.  I just bought a Swiffer mop and I LOVE IT...But I was just thinking how expensive it would be to buy those pads not to mention wasteful...NOT ANYMORE thanks to The Creamer Chronicles! These easy to make washable pads are reusable!!

Thanks for stopping by! Please go to these links and give these people some praise for their great ideas and follow through!

XOXO,


Thursday, September 27, 2012

DIY Mail Center

Finished product
I was thrifting at Goodwill the other day and came across this...

Most people would see a banged up piece of particle board nailed together in a funny way...I saw MAIL CENTER.

I decided to tear it down using a hammer and just keep the skeleton. I painted it black with two coats of craft paint.
Then I cut out a piece of scrapbook paper (I just love polka dots, don't you?!) and double sided taped it to the inside.
Then I decided to paint MAIL on the top in an antique way. (I sketched out the letters first with pencil and kinda traced them with paint. Even using those sticker letters would be cute!

After that I decided that instead of using the wood I had salvaged from the inside of the piece (which would have looked cool too) I would attach coordinating ribbon with a hot glue gun from one side to the other.

And voila... Our new mail center that looks cute and original.  Only cost me $1 (it was 1/2 off) + stuff I already had.

Hope you like it! We sure do! It keeps our ingoing and outgoing mail off the counter and we hubs always knows where to put/look for the mail now! Yay organization!!!

XOXO,


This post is linked to Tater Tots and Jello

Saturday, September 22, 2012

Nautical Sweater to Cardigan Thrift Store Mashup #3

     I had seen a pin on Pinterest (isn't that how it always starts?!) on how to make a sweater into a cute cardigan. I thought it was a great idea, and hey who can ever have enough cardigans? So I hit up my favorite local Goodwill and came up with a red and white striped sweater.  I decided I was going to transform it into a nautical cardigan(since nautical is all the rage but sooo expensive in stores)! So here it goes...

I measured across the front of the sweater and cut straight down the middle.

Then I pinned equal amounts of fabric up under the cut edge to make a nice even edge for me to hem (the inspiring pin used stitch witch adhesive, but I didn't have any and I would much rather sew it!)

I hemmed the edge...

And there you go!

Then I decided to really play up the nautical theme and added a row of three buttons down the sleeves like so...


I think it looks cute!


So there you have it my nautical sweater for a whopping $3 instead of $45 somewhere else!

A little thread and a few buttons go along way!

I'd love to see your sweater refashions! Leave a comment!

Xoxo,


  This post has been linked to The Stuff of Success, Tater Tots and Jello, and Classy Clutter.

Friday, September 21, 2012

Michelle's Musings: Fingerprints of Nature on Canvas

This is the story of my newest creation - a tree made by fingerpainting!
I know, I am not 5 anymore, but sometimes reverting to childhood can be both fun and therapeutic! So here we go...


Materials:
white canvas (whatever size or type you like)
burlap
sticks from the yard
bark from a tree
hot glue/hot glue gun - with electrical outlet for power! :)
paints of your chosen colors
paper/styrofoam plate (or artist palette)
your fingers!


I started with a plain ol' blank white canvas (I really love canvas). I put something else I really love on it too - burlap.
Ok, technically mine is more like sackcloth (which I bought from a bolt, but you could probably reuse an old potato sack if you have one!)

I cut the burlap-sackcloth in a rectangle slightly smaller than my canvas so that some of the white would show around the edges. I then hot glued it down. Be sure to use plenty of hot glue to keep it on, but not so much that it weighs it down too much.

Once the burlap was glued down, I went a'huntin' outside. I first began looking only for sticks, but during my search I decided to use tree bark as the trunk of my tree (you know, since that's what God used and all). So I gathered bark and sticks.

After I selected my outdoor supplies, I placed them on top of the burlap to see how I wanted them arranged. Turns out, I placed them just like I wanted them on the first try! I placed my sticks where I wanted them to be for the branches of the tree (I had to break many of the sticks into smaller, more practically-sized pieces). I then glued all this down.
Now, you want to be careful on this step how much hot glue you use, because the bark and sticks can really weigh it down. So don't use too much glue (you don't really need a whole lot anyway).

After this was finished, it was time to get my hands dirty being a kid again!

I selected the colors that I wanted to use for my leaves.
I wanted a fall tree, you know the way things will look here in a few weeks when the leaves really get to changing, but still with lots of green. So I selected 2 shades of green, 2 shades of yellow/gold, 2 shades of red/maroon (although one bottle was veeery empty!), and orange.
[Insert pic]

I only purchased one of the green paints..I used what I already had for all the rest. Since my canvas is fairly small, it did not require a great deal of paint to accomplish my task.

I poured the greens out on my styrofoam plate and got to work! I dabbed each fingertip of my right hand into the paint, so that my leaves would be varying sizes. I only used my fingertips, but you could use your whole fingerprint if you like!
After I fingerpainted a good bit of green, I added in some other colors, like red and yellow.

Then I repeated the greens again, so that the green was the most prominent of all the colors (I wanted it to look like there were only traces of fall beginning).
I added the orange and other shades of yellow and red, then repeated again with my greens.

I continued this pattern (ok, it was more randomized than patterned) until I had very little burlap showing on the area where I wanted leaves. I let the leaves of the tree hang over the burlap and onto the canvas, one, because trees can become invasive, and two, because Nikki suggested it. :) Good teamwork!

I realized that the more "layers" I created by dabbing colors on top of other colors, the more full my tree appeared, which is what I really wanted.
I also put just a couple of leaves falling and a pile of leaves on the "ground" below my tree.

After awhile, my tree was complete! I was satisfied with its color and fullness.

I then signed Nikki's and my initials on the bottom right corner. I will admit my goof on this one...so, I like to sign my canvases in Sharpie, and this one was no different. I first tried signing directly onto the burlap, then quickly realized this was not legible. It kind of even looked bad. Oops! Luckily, I did it at the very bottom of the burlap, where there was no glue right on the edge. (Lucky me!)
So I took my scissors and cut off the very bottom of the burlap. This gave me a little more white space to sign our initials onto the canvas! Yay, it's finally complete!

Then of course, I let it dry.

Random tidbits & tips with this project:
-You can use paint for the trunk and branches if you don't like the use of nature but like the idea of the design. I first planned to do all paint then realized it would be cool to make it 3-dimensional and more fun..more like me!
-You can make your tree be in whatever season you desire. Or, you could make one for every season! They could be interchanged throughout the year or placed together in a broken rectangle on your wall - whatever you like!
-You can make your tree as full or as naked as you like. As I said, layering the colors gives it a more full effect (as does repeating the same colors after using others in between). If you want to make a winter tree that is naked, you can use a lot fewer fingerprints!
-This project can be really great for children, too! (You might want to help them with the hot glue gun, or use Mod Podge or some safer, colder adhesive.) Many kids would probably enjoy the nature hunt for sticks and bark, too!
-As you paint your leaves, be sure to get some paint on the sticks (branches) too. It adds a cool effect (who doesn't love polka-dotted sticks?!) and looks more realistic, because we all know leaves consume their branches!

Please share with us if you decide to make your own fingerpainting tree. We would love to see what you come up with!

Blessings and love,
Michelle
Related Posts Plugin for WordPress, Blogger...