Saturday, November 17, 2012

Sugar Detox: Day 2

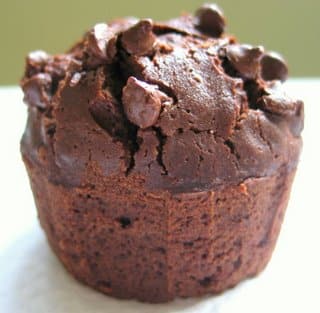
I thought a fun way to start out my entries would be putting a pretty picture of what I'm craving...Why not torture my will power a little more right?!
Picture from Carrots N' Cake


Second day out of the way...Success! No added sugar all day long.  Even when we went to hear and perform some live music at a coffee house which boast all kinds of yummy naughty drinks and foods like a nutella panini.  And late in the day I didn't even take a bite of my friends oreo McFlurry...I almost did but then remembered that just a bite could send me spiraling back over the edge!!! My resolve didn't waver, but I did get a little craving. I had a little bit of honey on some bread, and honey is natural and doesn't contain white or brown sugar, it's natural so I think it's okay!

On that note I had a dull headache almost all day, which I'm pretty sure is because I cut out the sugar.  I guess it's like getting off of any kind of addictive thing you are on.  You have withdrawal symptoms...It's crazy that I get them from sugar...I mean heck it's SUGAR!!!

I have been thinking though on why I feel the need to have sugary sweet things on my tastebuds all the time and I think it's because in America we attribute sweet things to a good time and being happy (i.e birthday cake, mom's desserts, candy for a treat or gift).  Then as we get older we have the ability to access that stuff all the time and heck why not have happy fun time on your tastebuds that makes your brain feel happy all the time?!

Just my thoughts...

Day 2 done onto the next one!

XOXO,


DIY Clothespin Magnets

I don't know about your household but in mine we are always in the great magnet shortage.  We for some reason really love hanging things on the fridge, but never seem to have enough magnets...SO to solve this problem once and for all I made some out of things I already had!

I used an existing magnet we already had... you know those super cute Save the Date magnets...well I chopped one of those up (Sorry guys) and used that to magnetize the mini clothes pins I had.

Just cut a piece of a magnet sheet-yup that's a technical term :) (use all those Save the Dates...put those old ones to good use!)

...and hot glue it to the back of whatever you want to magnetize. I had some mini clothespins laying around and decided to make them into cute and functional magnets like so.


I also painted a few, just to add a little pop of color and some team spirit :)


Cute and functional!

XOXO,

Friday, November 16, 2012

Sugar Fast: Day 1

Picture from mindbodygreen.com

I did it.

I made it one full day without any added sugar or sweet sugary donuts or anything else that I hate to love!

I only had a tiny craving at night, which seems to be when my cravings hit hard, but instead of succumbing to sugars evil bewitching powers I said NO.  I said no to sugar for the first time in a long time...and you know what? It felt good. It felt REALLY good.  After my craving subsided I looked inward and saw my willpower against sugar for the first time in a few months!!

It's only one day...But you gotta start somewhere right?

XOXO,
Nikki


Michelle's Musings: Thanksgiving Crafts for Children

Hi all, and Happy Thanksgiving!

There is nothing more precious than children's artwork to decorate a house, and what better way to remind ourselves to be thankful this Thanksgiving season than Thanksgiving children's crafts?! I am pretty excited about these....

So...I work full-time in a homeless shelter and part-time in a church preschool ministry, meaning, I get to interact with lots of kids! And it's cool because I just get to play with them and what-not, then send them back to their parents...kind of like a grandma!

Anyway, so as I was at work at the homeless shelter one day, I decided to make some Thanksgiving decorations with a preschooler to decorate the house. Here is what we came up with...

Leaf Garland


 Materials:
Leaf coloring page print-outs
hole punch
crayons/markers/colored pencils
twine (or rope or whatever you choose to use)
scissors

I printed off several copies of several different leaf coloring pages. (I Googled "leaf coloring pages," found three or four that I liked, and printed several copies of them) Then it was color time! I love to color...so, I sat down with this kid and the kid's mom, and we colored our leaves! Kid was not as enthused as I was, but that's ok.

After Kid scribbled and Kid's mom and I colored like big girls, I cut the leaves out and punched a hole in each. I then took some twine and measured how long I wanted the garland to be, leaving room for slouch (giving it "slack") and knots. I then made knots in it like this to separate each leaf and hold it in place:
[insert picture]

I kind of went bazerk on my knots and made them too close at first...just judge by how many leaves you have and how long you want your garland to be.

Then, I strung the leaves onto the string, and voila! Your kids might help you with the stringing part, but there was no way this little preschooler was about to do that...got better things to do!

I then double tied each end around the rails of the staircase (right above some kids' Noah's Ark drawings..can you tell I like kid artwork??) and had some fun Fall garland! My favorite leaves are the ones that are mostly white with a little scribble! (Most of the scribble made it onto the parts of the paper that got cut off..precious children!)


Thankful Turkey

Materials:
construction paper (I used white, orange, yellow, and red)
markers (Sharpie or a black skinny Crayola, and a yellow and red skinny Crayola)
brown crayon (for Kid to color)
scissors
stick glue


I like to call this little dude my Thankful Turkey. He was so simple to make! I used white construction paper (so that Kid could color it brown, making it more interactive..you see how much brown made it onto the paper...) and drew an almost circle and a full circle. I made two dots then drew a circle around each for eyes. That was easy!

After drawing a yellow nose and red google, I wrote Psalm 118:1 on his belly, which made what I wrote on the leaves make more sense. If you don't like that, you can put something like "We are thankful for..." or "Thanksgiving" or something cutesy that makes you smile. Or frown, if you so choose, but this is Thanksgiving!

I then cut simple feather-like shapes from red, yellow, and orange construction paper. With the size that I made them, I just used one full sheet of each color and had the number of feathers you see in the picture.

Then it was Kid interaction time again! I asked Kid and Kid's mom what we were thankful for, and you can see what we came up with (paper to color on...brilliant!)

I then placed each feather where I wanted it to be and stick-glued each one down. I added extra glue to the parts where the feathers overlap one another, so that it would not be as floppy (who wants a floppy turkey??!).

Turkey Man
Materials:
toilet paper roll (I actually used a paper towel roll and cut it..improvising!!)
craft sticks (I used ones already red, orange, and yellow..but you could use markers to color plain ones!)
hot glue gun/hot glue
markers (black, yellow, red)
black construction paper
Scotch tape
scissors

It's Turkey Man time! He literally makes me laugh. And would you know...I did him all by myself, no kid help (because Kid was busy with more important things!) We did not have a lot of resources on hand (it is a homeless shelter, after all, and art is not always our top priority), so I improvised, but I wanted it to be simple, something a child could do, and look like a kid did it (so that people would not make fun of me because it does look like a child did it!).

Anyway....so I started by cutting my paper towel roll into toilet paper size. Then I drew eyes and glasses (I was going for hipster..kind of turned out nerdy, but that's ok too! We accept all kinds of turkeys) and a nose and google.

Then it was hat time! This is where you are really going to laugh at me...
I cut a strip of black construction paper like this:


I pulled it around into a circle and sized it up to Turkey Man's head so his hat would fit. I then made another small strip, as you see here:


Then (here's the genius part!) I taped the smaller strip onto the rounded strip to make his hat stay on his head, like this:


Next the hat needed a bill. Or whatever it is called on a top hat. So..I drew a circle around the paper towel roll and a bigger circle around that one, onto the black construction paper. I was not being OCD at this particular moment, and my pen kept messing up, so my circle is pretty janky, but whatever.
[insert picture "turkey man 5"]

The cutting of this circle is important. I cut the inside of the inner circle, but I left a tab on each side so I could secure it onto the hat:
[insert picture "turkey man 6"]

I then used the tabs to tape the bill to the bottom of the hat. Done with Turkey Man's hat!

Now, Turkey Man needs feathers. I took the craft sticks, alternating colors, and held them a few at a time where I wanted them placed on his body, then secured them. To be honest, because we had no hot glue (homeless shelter!), I improvised with tape. Tape looks silly, just to let you know.

Then he is finished! Turkey Man! I feel like he should be in Avengers 2....or maybe just his name? Maybe not. Whatever.


So there you have it! Some fun, interactive, simple Thanksgiving kid-friendly (and budget-friendly, because craftiness can be expensive!) crafts to decorate the house!

Happy crafting, and Happy Thanksgiving, y'all! Eat lots of turkey! But not Turkey Man.....


Blessings,
Michelle

Thursday, November 15, 2012

My Sweet Addiction

I have a confession to make...I'm addicted...to sugar.  No seriously, you can laugh but I have a problem! I eat sugar like it's going to disappear off this Earth in the next day.  It has almost gotten to the point where my will power checks out and I can't not eat dessert after every meal.  

So this is it. I'm done with the hold that the granular, sweet substance has on me.  I declare a 21 day fast of sugar from today! I need to detox my system so that I don't have these intense sugar cravings.

My over consumption of sugar is only going to lead to bad things for my health.  Sugar consumption can lead to high blood pressure, diabetes, weight gain (which I've already been battling) as well as early aging! OH NO! All of those are a bit to scary for me so it's time to start some changes.

I'm gonna try and update you all about my progress andddd I want to invite you to take the sugar detox challenge with me!

Let's get sugar free NOW!

Here are the rules:
No granulated sugar
No adding sugar to anything
No overtly sweet things like donuts or pastries
Use your common sense (If you wanna eat a small piece of pumpkin pie on Thanksgiving nobody is gonna be mad!! This is to get healthier and get out of the clutches of sugar!)

XOXO,

Wednesday, November 14, 2012

Painted Canvas: Love Life

I decided to reuse an old canvas Michelle was getting rid of and make it my own little project! I wanted to make it to hang beside my mirror in the bathroom...you know something inspiring and something truthful to start and end the day on.  I had lots to choose from but decided on this,"Love life as it is, not as ou want it to be." Powerful, truthful and something I've been learning as of late.  I also wanted to incorporate our bathrooms colors and birds...of course.  I just stinkin' love birds, they are just so cute! (if I could have bird everything, I think I would)
Here was my inspiration for the project:
Picture from Pinterest off of http://hihorosie.blogspot.com/
And here is my finished project!


I hope you like it and get inspired to put your own personal mantra on something to remind you of whatever it is you need to be reminded of daily!

XOXO,
This project is featured on Eye Heart


This project is linked up at Not Just a  Housewife, Eye Heart, Kathe with an E, Gunny Sack, Sugar and Dots, Sewing Barefoot and Tuesday Time Out.  You can find links to these fabulous parties and blogs under the page link Linking Partaaaay! Check 'em out!

Tuesday, November 13, 2012

Top Pins of the Week #7

Can you believe it's been just seven weeks since Domestically Modern has been doing it's thing? I certainly can't! I love blogging, I really didn't think I would love it as much as I do. But the community is just so great and the inspiration never runs dry for these people!!  So anyways here are my favorite pins of the week!

I love the look of colored jeans but I can't seem to convince myself to spend the money on them...So this is a good and much cheaper compromise for me! Can't wait to try this out!

I think this is just simply genius.  The organizers made specifically for makeup are stupid expensive and this is such a great and cheap way to organize all your pretty things! I might spray paint mine or do something silly and crafty to it...but I love the idea!

Don't these look sooo good? I thought so, and the fact that I had all the ingredients in my pantry right now males this recipe a winner. Check it out, this would be a hit for the holidays...or heck any day you need a sweet treat!!

So cute, so functional...AND I can make it in an afternoon! Super excited to dig out the sewing machine and get cracking on one of these!

This would be great for the holidays and could go along with the color palate of the room it's going in.  I love how festive it is, and how they used yellow and off white.

So there you have it folks, my pins of the week! Enjoy, repin, and be inspired by these lovely ideas these awesome bloggers had!

XOXO,


Related Posts Plugin for WordPress, Blogger...